Showing posts with label photoshop. Show all posts

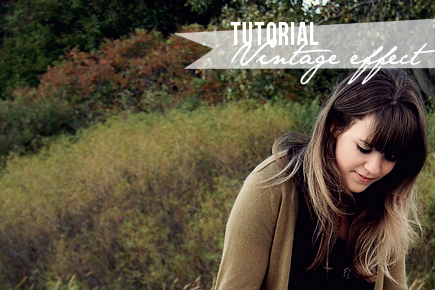
BONUS: VINTAGE PHOTO EFFECT PHOTOSHOP TUTORIAL


If you're looking to give your photos a nice vintage effect, follow along with this fun tutorial! You'll need Photoshop. I use CS4 in this version, but any version should be pretty much standard. You can follow along with the video to see the tutorial in action, but go ahead and reference the steps down below. Enjoy!

To view the video, enter the password:
indieblogger
!


Step-by-step instructions:

1. Open your photo you want to edit in Photoshop
2. Create a copy by dragging down to the new layer button
3. Click on your background copy layer to edit
4. Click on adjustment layer > Brightness/contrast > Do a +20 on contrast
5. Click on adjustment layer > Hue/saturation > Do a +20 on saturation
6. Click on adjustment layer > Curves > Edit each RGB on it's own:
This will vary on each image.. Red: 84, 85; Green: 65, 75; Blue: 23, 0
7. Click on background copy layer
8. Click on menu > Convert for smart filters
9. Click on menu > Filter > Distort > Lense correction > -100 on vignette
10. On layer, double click on arrows with lines > Change opacity to 50%
11. Make sure background copy is selected
12. Click on adjustment layer > Hue/saturation > Click colorize: Create sepia tone
sepia tone will change, but should be around 35, 15
13. Change that adjustment layer to a 50%
14. Click on adjustment layer > Solid color > Choose a bright pink color
15. Change layer to 5% opacity
16. If it's too overpowering, create a group and pull all of your layers (besides original background copy) into the folder.
17. Change the opacity of the entire folder down to a 50% or less!

All set! Now you have a nice, warm, vintage-colored photo! Thanks for watching! xo, Tieka


Pin It!

Photography: Using Actions to Edit Photos


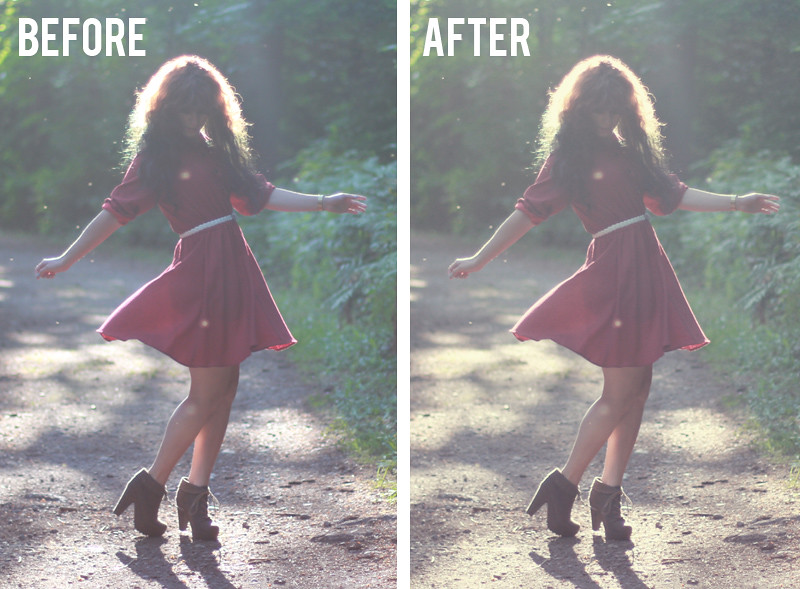
While editing your photos is not essential, I often find that it can add a little bit more *pop* to the images, or can assist in creating an atmosphere on your blog. So, say you're a more vintage-y blogger, applying a vintage effect to your photos can really help people sink into your blog as a vintage blog. Sometimes editing your images can simply be out of necessity. Maybe your images are a bit too dark, editing them to be a bit lighter can really help them look better!

I use Photoshop for my editing.  I don't like to do too much editing to my photos, but it's definitely a personal preference. A lot of how you decide to edit your photos has to do with your branding. So, for example, if you are branding your blog as a vintage/retro blog, then you might choose to use vintage effects on you photos.


Using Photoshop Actions to edit

If you have Photoshop, you can use actions, which make editing super easy and fast. Mandi has a set of actions which you can purchase, and you can also get actions from Totally Rad! which are really great as well. I recently switched my editing process to using actions and I love it!

actions

Here's how you use actions:

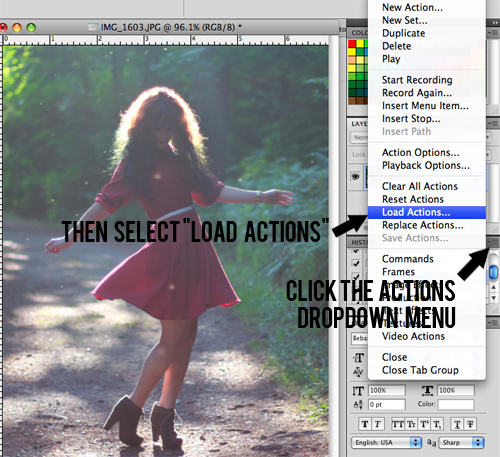
Open you photo in Photoshop and click the Actions tab next to the History tab. To load your actions, click the drop down menu in the Actions tab and click "Load Actions."

load actions

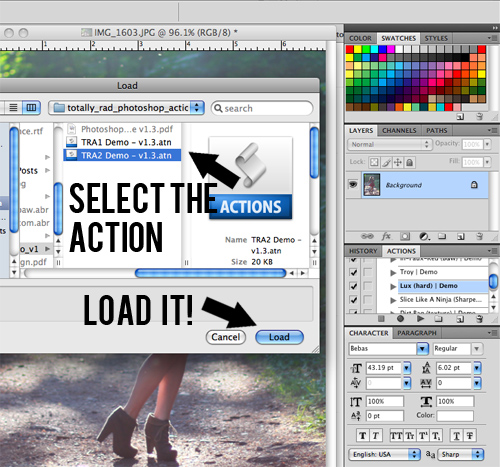
Next, find where you have your actions saved and select them. Then, click "Load".

load actions 2

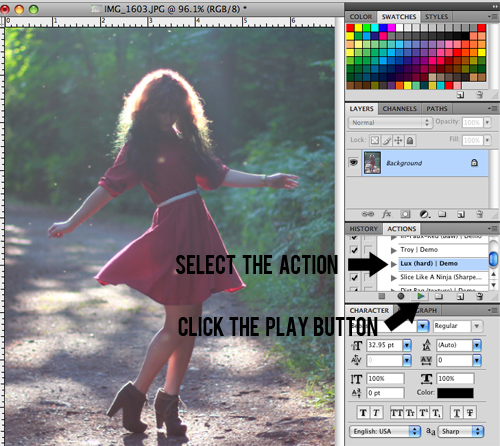
Now your actions are ready to go! Find the action you want to apply to your photo and select it in the list. Then, click the little "play" arrow underneath, and watch the magic happen!

actions1

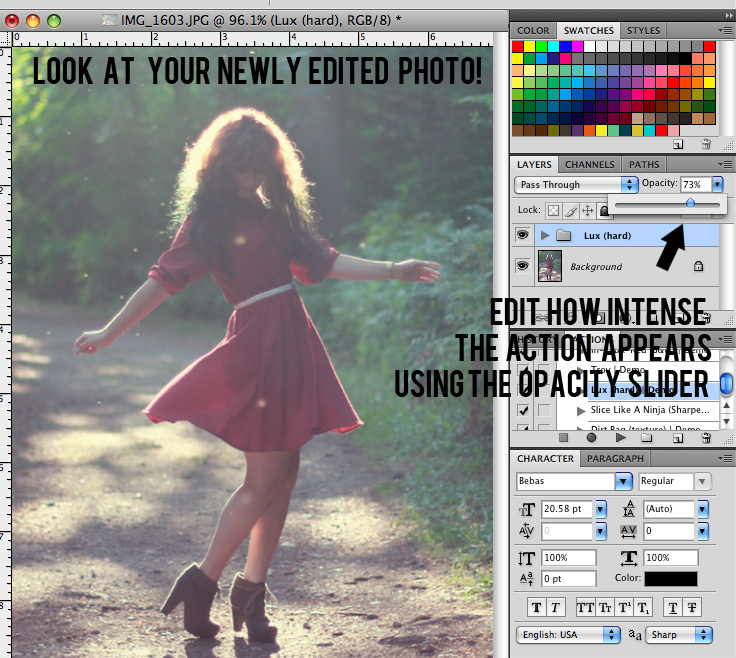
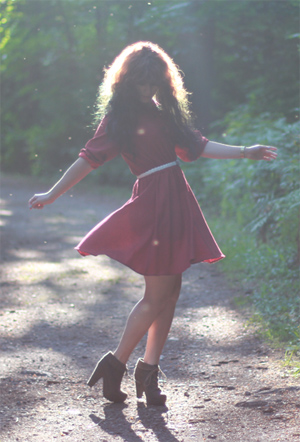
After the action has been applied, you can make the effect less strong by decreasing the opacity on the action layer. Just select the layer of the action you just did and use the opacity slider to adjust how much of the action shows on your photo. I usually put my actions at around 50-80% opacity, but it really depends on how the action looks when applied to a photo.

actions2

Now just save your photo as a jpg and you're ready to upload it!

Totally Rad just came out with their RadLab, which looks amazing! It costs $149, but it seems like a perfect tool for bloggers! Check out the informational video and learn more to see if the investment is a good idea for your editing!

Sizing your photos

A good thing to keep in mind is to try to keep the size of your photos similar to the size of your blog. For instance, the width of the photos in my posts is 600px, so I wouldn't want to upload a huge photo that's like 5000px wide because I'm just going to slow down the time it takes for my blog to load.

It's also important to make sure your photos are big enough to fit into your blog as well. If you try to make a 300px photo into a 600px photo by just stretching it, you'll end up with a yucky pixelated photo like so:


toosmall

Pin It!

Photoshop Tutorial: Actions & Automate Batch


This tutorial will be great for Photoshop users who are looking to save time with editing their photos! I will show you how to create a new action in Photoshop and how to apply those actions to several photos with just the click of a button!

Note: Sorry if the screen is cut off a little bit, if you have any questions whatsoever on this tutorial, just email me at tieka@selectivepotential.com and I'll be happy to answer!

To view the video, enter the password:
indieblogger
!


Pin It!